前言
自从vue3.0正式发布之后,vue3.0核心响应式部分被单独抽离成@vue/reactivity包,也就是说,我们可以脱离vue框架之外,单独使用@vue/reactivity做一些其他的愉快的事 ?,于是乎笔者突发奇想,为何不用@vue/reactivity在react中,构建响应式,省着每次调用this.setState,useState,直接通过改变state值,做到更新视图。
??? 说干就干,为了可以量化生产,复用逻辑,我在function组件中写了一个自定义hooks-useReactive ,在class组件中写了一个高阶组件reactiveHoc。
在 react 写 vue 是不是有点不讲武德呢?

实际写这篇文章的目的是:
-
1 在重温一下 vue3.0响应式原理,reactive和effect。 -
2 如何编写一个响应式的自定义 hooks,学会写自定义hook。 -
3 如何编写一个响应式的 HOC,学会写hoc。
函数组件-自定义 hooks - useReactive
编写
useReactive 自定义 hooks
import { reactive, effect  } from '@vue/reactivity'
import React, {  useRef , useEffect, useMemo, useState } from 'react'
function useReactive (initState){
   const reactiveState = useRef(initState) // state
   const [  ,forceUpdate ] = useState(0)
   const state = useMemo(()=> reactive(reactiveState.current)  ,[ reactiveState.current ])
   useEffect(()=>{
       let isdep = false
       effect(()=>{
           for(let i in state ){ state[i] } //依赖收集
           isdep && forceUpdate(num => num + 1)  // 强制更新
           if(!isdep) isdep = true
       })
   },[ state ])
   return state
}
思路:
-
① 用 useRef保存响应式对象,并构建响应式,为什么选择useRef,在函数组件执行更新中,只有Ref-Hooks一直使用的是原始对象,这之前的hooks原理中讲过。这样做的好处,防止函数组件更新时候,响应式对象丢失。 -
② 用 useMemo缓存响应式对象,当Ref对象被篡改,重新构建响应式。 -
③ 用 useEffect做响应式的依赖收集,用开关isdep,防止初始化@vue/reactivity的effect初始化执行时,引起的forceUpdate引发的,额外的组件更新。 -
④ 用一个 useState,做强制更新。 -
⑤ 在 effect对象中,for(let i in state ){ state[i] }遍历Ref对象 ,做依赖收集。
使用
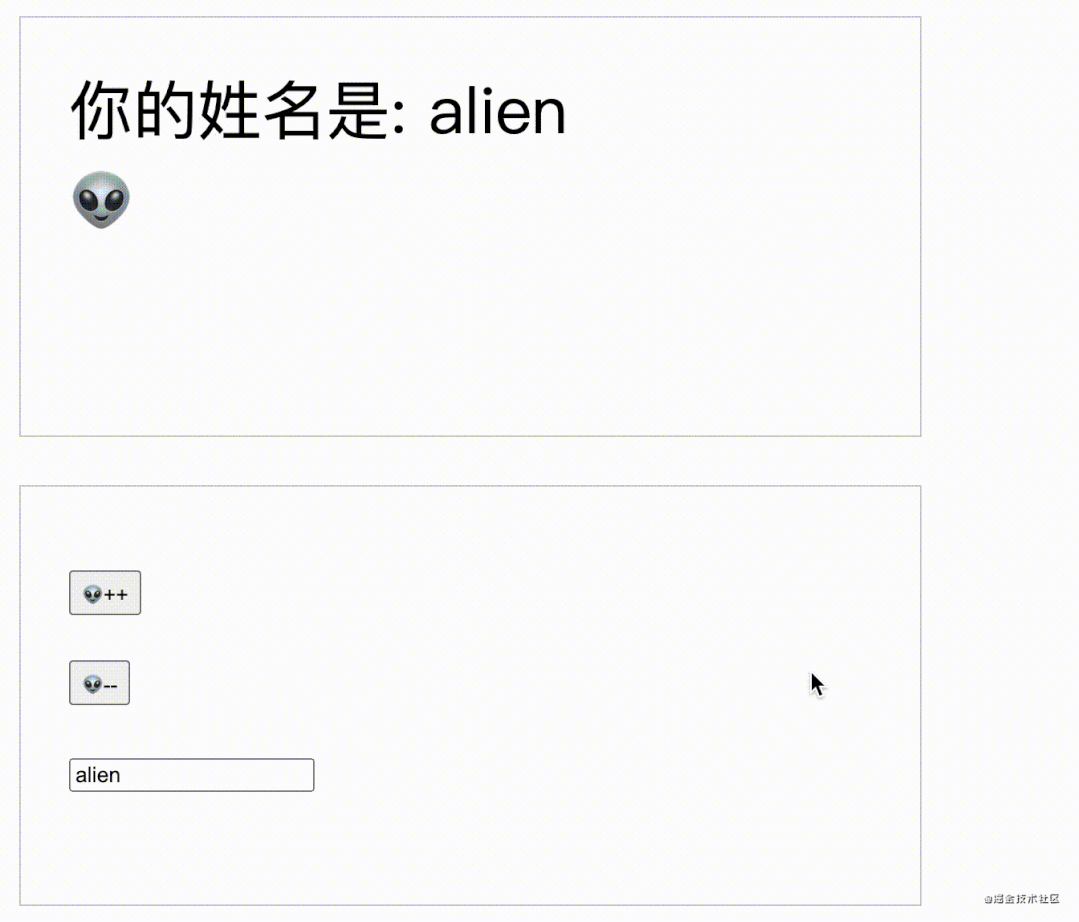
function Index(){
   const state = useReactive({ number:1  , name:'alien' })
   return <div className="box" >
       <div className="show" >
           <div> 你的姓名是: { state.name } </div>
           <div>{ new Array(state.number).fill(0).map(()=> '?') }</div>
       </div>
       <div className="constrol" >
            <div> <button onClick={ ()=> state.number++ } >?++</button> </div>
            <div> <button onClick={ ()=> state.number-- } >?--</button>  </div>
            <input placeholder="姓名" value={state.name}  onChange={ (e:any) =>  state.name = e.target.value   }  />
       </div>
   </div>
}
效果
类组件-反向继承 hoc-reactiveHoc
在function组件中,我们可以使用自定义hook,构建响应式; 那么在class类组件中,我们如何构建响应式呢,每次在业务组件中引进reactive和effect,手动绑定,显然不是很切合实际,也不是我们的追求,这个时候,hoc高阶组件就派上用场了。我们接着往下看:
编写
reactiveHoc 高阶组件
import { reactive , effect  } from '@vue/reactivity'
import React from 'react'
function reactiveHoc(Component){
    const self_componentDidMount = Component.prototype.componentDidMount
    return class WrapComponent extends Component{
        constructor(props){
            super(props)
            this.state = reactive(this.state)
        }
        __isFirst = false
        componentDidMount(){
            effect(()=>{
                for(let i in this.state ){ this.state[i] }  //构建响应式
                this.__isFirst && this.forceUpdate()
                !this.__isFirst && (this.__isFirst = true )
            })
            self_componentDidMount && self_componentDidMount.call(this)
        }
    }
}
思路:
-
① 为什么要选择反向继承模式 HOC呢? ,因为我们可以通过一个反正继承的hoc,访问到内部的state状态,对于内部的state,进行reactive响应式处理。 -
② 劫持类组件周期 componentDidMount,在hoc的componentDidMount中同样做依赖收集。
使用
@reactiveHoc
class Index extends React.Component{
    constructor(props){
        super(props)
        this.state={
            number:0,
            name:'alien'
        }
    }
    componentDidMount(){
        console.log(6666)
    }
    render(){
        const { state } :any= this
        return <div className="box" >
        <div className="show" >
            <div> 你的姓名是: { state.name } </div>
            <div>{ new Array(state.number).fill(0).map(()=> '?') }</div>
        </div>
        <div className="constrol" >
             <div> <button onClick={ ()=> state.number++ } >?++</button> </div>
             <div> <button onClick={ ()=> state.number-- } >?--</button>  </div>
             <input placeholder="姓名" value={state.name}  onChange={ (e:any) =>  state.name = e.target.value   }  />
        </div>
    </div>
    }
}
总结
本文主要的目的并不是教大家在react用@vue/reactivity构建响应式,可以当娱乐玩玩罢了,主要目的是结合上两篇文章,教大家更好编写自定义hooks和 hoc。早日进阶react技术栈。
- EOF -
觉得本文对你有帮助?请分享给更多人
推荐关注「前端大全」,提升前端技能

点赞和在看就是最大的支持❤️

文章评论